
 THE Wireless How-To for BeOS

Hey, a computer doesn't HAVE to stay in one place! Recently, a client of mine gave me a shiny new Dell TrueMobile wireless PCMCIA NIC! It's actually a rebranded Lucent Orinoco Gold card (the Gold means 128-bit encryption). Then, my sister gave me a dead laptop, which was under warranty and fixed good as new. Combine the power of both and you get a nice mobile BeOS system. Well, I wasn't content to have the card hanging there, so I've spent some time reading and playing with settings galore to figure out how everything needs to be to get it all going. This way I'll be able to program on the go, or out in the yard while the kids fight amongst themselves. Oh, and this has lots of pretty pictures. I know you like pictures.
Ok, here's a quick sketch of what we are gonna do:
- Figure out if it's there
- Add it to a list so BeOS knows it DOES exist
- Make sure the networking sees it
- Configure it for the world
OK, first things first. Here is a list of what you will need:
- BeOS R5
- BONE
- Wireless card - usually 1 of 2 chipsets - the wavelan or prism
- This How-To
#1:
OK. Make sure your box is fine running R5 with the BONE upgrade. This is crucial. Without this there is no wireless. I have not been able to get the drivers working in a Net_server environment yet. I'm looking into it.
#2:
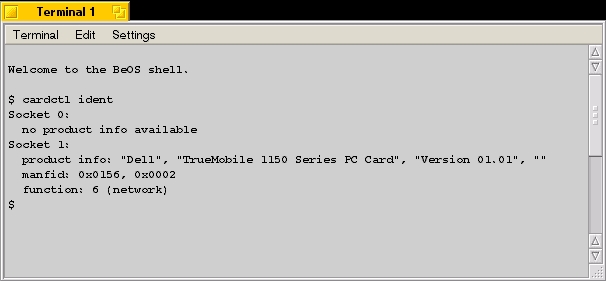
Now, insert your wireless card into either PCMCIA slot. Open up a terminal window. Now, in the terminal, type this (as seen below): cardctl ident
I select the text for the card it is and copy it. Leave this window open, as we will need to to make sure things are right.
#3:
Open the file: ~/config/settings/kernel/drivers/pcmcia.default as seen in these images and save it immediately as pcmcia in the same directory (look at the title tab on the right image)
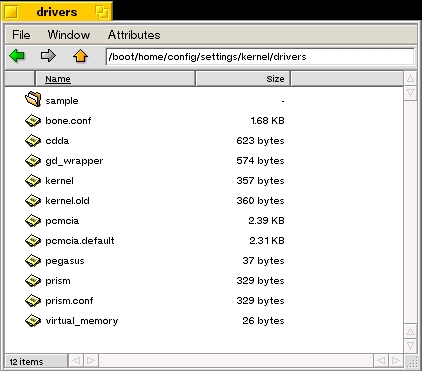

Go all the way to the bottom of the file. Copy the format of the last entry. Insert your wireless card into there where appropriate. Compare the image on the right with the picture of my terminal window above to see what I added. The key here is the line labeled "bind". There are two things you can put in there. "wavelan" or "prism" Try "wavelan" first. If what we do later doesn't work, then use "prism". What that line does is tell BeOS what driver to load when it sees the card. Save the file. Don't close it yet as you might need to change the "bind" line.
#4:
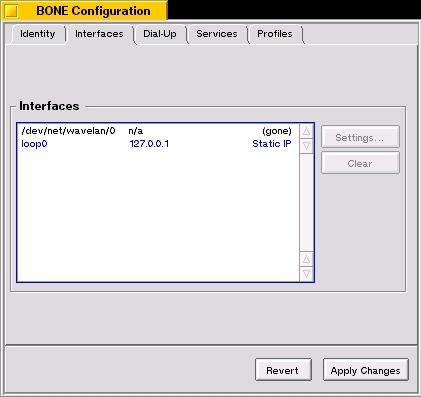
Remove the card. Reinsert the card. Open up BONEyard. Click on the interfaces tab. You should see something similar to these images (wavelan on the left, prism on the right):
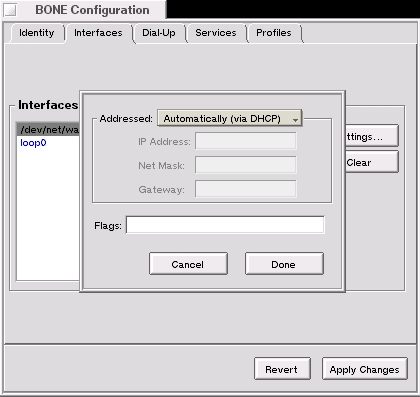
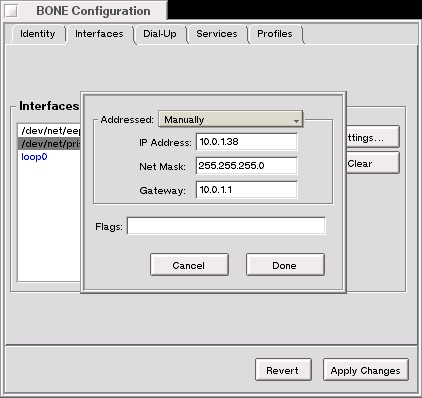
#5:
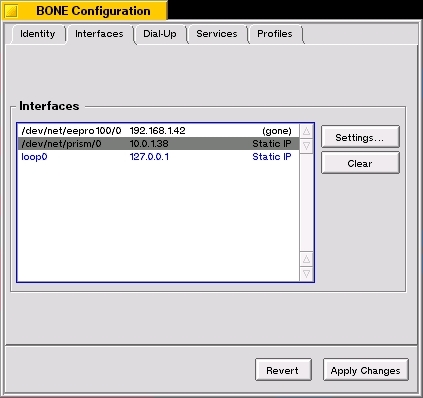
Configure the card as a normal NIC. Set it up for either DHCP (left) or configure it manually (right). Apply changes. If you are using a wavelan card, you are done! If you are using a prism card, keep going.
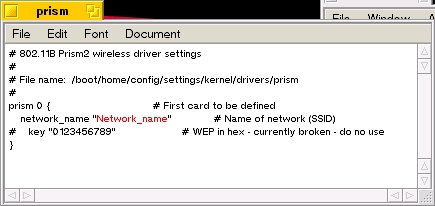
#6:
If you have the prism cards, then you still need to configure one more file so it knows where to go. Open the file: ~/config/settings/kernel/drivers/prism.conf as seen in these images and save it immediately as prism in the same directory (look at the title tab on the right image). You will see I have highlighted in RED the part you need to change. Change that to the SSID of your AP. If you don't know what it is, you shouldn't be doing this in the first place. WEP does NOT work in these drivers. It even tells you so in the file you are editing. :-) Save the file. Yank the card. Reinsert the card. Reconfigure the card. Off you go. Enjoy!
NOTES:
- Please note that I have only tested this on 4 separate machines across the globe. I am in no way an expert in this, but hey, dammit, it's worked so far.
- You will have to reconfigure the card EVERY time you reboot or yank the card. Dunno why yet, but that's what I've had to do everytime.
- I have used DHCP and it works great. It even works on the Linksys routers that have problems on wired in machines! Now, this also sometimes alleviates the need for reconfiguring everytime.
- If the BONEyard keeps crashing on you, try switching driver bindings (you remember, step #3)
- Have fun!